Normski4ash - Macro Photography
My Way ?
An insight into the way I go about macro, everything I have learned over the years, the mistakes I have made and my triumphs. I am not saying YOU HAVE to do it this way, I'm saying this works for me. Please read, enjoy & digest... Comments welcomed... And if I teach you one thing here, then I have achieved my goal...
Tried to keep it light hearted with a bit of wit to make it easier reading, feel free to return anytime to swat up so to speak.
This is taken from a talk I have done a couple of times for local camera clubs, it went down well with them, hope it does with you, Thnx &
Enjoy
Many many moons ago I spotted a spider in the hedge in my back garden !
No ordinary spider, it was huge, Gi-normous, Massive, man eater? No, this was an elephant eater. So I dropped the hedge cutters, (Any excuse) and ran in the house screaming... "Where's my camera" found it, grabbed it and ran back out (yeah and you thought I was a sissy and scared of spiders - admit it) took half a dozen shots, ran back in the house plugged into the PC and... RUBBISH ! tiny, blurry, unrecognisable... Camera shake, where's my tripod... Better but still blurry, The wind is blowing and the web is vibrating causing motion blur, faster shutter speed...
To cut a long story short - I ended up with a picture of a spider that was miniscule... Where did I go wrong ? And so I did what every professional would do in a situation like this, I Googled it, and I went to the library and got a book, and I got a video, and I watched you tube, and I learned - that the best way to do this is go out and play...
So with camera in hand I trundled off along the Bridgewater canal bank which runs close by our house, and I knew there were several gardens backing onto the canal, plenty of flowers to photograph...
 Flower 4.jpg |  Flower 2.jpg |  Flower 3.jpg |
|---|---|---|
 Flower 5.jpg |  Flower 1.jpg |
One red one
One white one
And one with a bit of smeg on
Another yellow one
And another white one
So I got home, plugged into the PC, and had a look. Imagine my horror when I saw one of my prized photographs had a tiny bit of smeg on it ! Took it into photoshop with the intention of cloning it out. Zoomed in, zoomed in again, third time lucky, zoomed in once more... OMG, my bit of smeg had...

Two eyes

At least two legs

Two Antennae

And a mouth
And a mouth... that was smiling up at me, safe in the knowledge that I was a stupid human being, and it was so small that I wouldn't even see it, even though it was in total contrast to the colour of the flower ! And it was right, all I saw was the flower, oooh thats pretty, click and go...
So the next time I went for a walk with my camera, I stopped, I looked and I listened, the green cross code, spend a moment and look before you leap...

So this is the agenda for the talk, we will look at what we can do with a compact camera, a few home truths/ my point of view, Half time - I'll be ready for a brew by this point - Going to look at different equipment, my likes and dislikes (don't forget this is my way, it works for me, not saying it will work for you, maybe you have or will find a better way) a look at what to expect from the equipment, a few of my pictures, probably don't need this as they are all on this site, and questions and answers, please feel free to ask, go to the contact page and I will answer if I can
Compact - Point & Shoot or DSLR actually


First thing we have to do with any camera is get it off full auto. Take the step NOW, you won't regret it, go out take some pictures out of auto, come home have a look. Are they rubbish, what have you done wrong, learn by your mistakes, it wasn't a wedding you were shooting so it doesnt matter, play, try different things, get proficient on none important things. Then when that important time comes you will be ready and your photographs will be so much better for it
So what is wrong with full auto ? it works ! well kind of. The modern camera is a very clever piece of kit, trouble is with full auto, it is based on a set of ideals written into the cameras program, press the shutter button half way down and the camera takes a meter reading, and from this one reading it determines the aperture, the shutter speed and the ISO settings. I'm sorry but no program in the universe can know what you are photographing, it cannot tell if the glass is half full or half empty !
As a for instance, you may be at Silverstone taking pictures of superbikes wizzing round at 200mph, by the same token you could be in Shanghai basin taking pictures of snail racing. If both lighting conditions are the same, you will get the same settings in camera. Whereas superbikes require a very fast shutter speed, snails not quite so fast a shutter speed. I know that, you know that, the camera in full auto doesn't
Natural progression from full auto is to go to what the camera manufacturers like to call "Creative scenic modes" a better name for these would be "Idiot modes"...
... I could choose any one of these and explain why, we are talking macro, so lets go with that option. Set the camera to "macro mode", depress the shutter half way down, the lens focuses and the camera takes a light meter reading. Macro program mode kicks in, we are shooting close to our subject. OK, the closer we get the shallower the depth of field, we may be so close we are blocking the light from the subject.
Shallow depth of field so we need a small aperture to give a greater depth of field, a small aperture requires a long shutter value to let sufficient light in to give a correctly exposed image, Ah but, if it's an insect it may move, a flower may blow in the breeze, we need a fast shutter speed to compensate.
I know let's give it a middleing aperture and a middleing shutter speed, then ramp up the iso to correctly expose the shot
I could quite easily re write that last scenario for any of the Creative (Idiot) Modes. They are better than full auto, (Not A Lot) but there is no creativity factor built in to any of them...
Wind
OK so we are going out to photograph Macro, generally speaking the things we photograph are small like these flowers, small means thin stems, flexible, bendy easy blow in a breeze.
To freeze the action calls for a fast shutter speed, however this may give us a wide open aperture, which will give us a shallow depth of field. Try to put something between the flower and the wind, be it yourself, your camera bag, or my favourite is a piece of white A4 card I have laminated. This not only blocks the wind, slips in the camera bag & doesn't weigh much, it acts as a reflector, angle it up-down-left-right, watch the light, the more you can get in generally the better. More light gives faster shutter speed, smaller aperture, lower iso ! Win-Win-Win situation

Meadow Pansy Chickweed

Camera Shake
Can be a problem, the more we can remove it the crisper & sharper will be our images.
Most modern cameras have a timer on them, the 2 second one is the one we want. Read the Manual (RTM) if you don't know where it is. Camera on a tripod (will get to tripods in a bit) push the shutter button, you will move the camera, let go of the shutter button and as the picture is taken the camera is moving. With the 2 sec delay, the camera can get over your big finger prodding it and be still for the shot.
Anothe idea is a cable release, this is a bit of wire and a switch. As you press the switch an electrical path is made and the camera fires, you don't need to push down on the shutter button, hence no movement. Result, either or, both work, and the delay is built into the camera, nothing to buy
Add on's
You can actually buy seperate lenses for compact cameras, never seen one or used one, but the write ups are favourable. Couple of things to look out for, if you have a lens on the camera that goes out and in, then these are no good.
Basically this particular one comes with a bit of sticky magnetic tape, which you stick on to your camera front (not over the lens but close to it) and if you look at the right hand image that shiny ring is a magnet, it goes onto the magnetic tape and sticks there, easily removes as well.
they do a Macro a Wide Angle & a zoom


Add on Mk 2
Just seen this on the web, it's called the Little Big Shot" and can be found here :- http://littlebigshot.blogspot.co.uk/
Bit of string to hang on to it, two elastic bands to go round the camera to hold it in place, and as you zoom in and out with the lens, it goes with it... Seemples.
Again never used one so don't know
Different angle
Photography is all about composure, you may get to a scene and think "Oh Yea" Click & walk away. Can't remember who coined the phrase, but it has been said by many professional photographers since, "The first place you put your tripod is the wrong place" and it is very true. Take a step or two to the left, have a look, take a step or four to the right, have a look, step forward, step backward, kneel down (your pants will wash) stand on something... look at your scene from every possible vantage point, maybe to the left puts a litter bin in the shot, maybe to the right adds a bit of foreground interest, (thumbs up for that) maybe a step backwards gets you run over or a step forward tips you over the edge of the cliff. There are so many possibilities and angles, zoom in zoom out, look at what you get through the lens... So what has this got to do with Macro. This is a shot of a wasp from above, nothing wrong with the picture - BUT...


what if I were to get down on my knees and take the shot, looking up ?
The above is the view everyone sees of a wasp in the window of the house, just before they swat it with a newspaper (do they still sell newspapers ?) so everyone has seen it, it's a wasp. Take a walk down the street, Oh look there's a pretty bunch of daffodils, "Click" show it to someone and they will say, "It's a bunch of daffodils, there's one in the garden round the corner, it's boring" they probably won't say it but they will think it.
Be different, get down on your knees, bum, stomach if need be, take the shot from an unusual angle from the norm. It will make the shot much more interesting.
Compare the two wasps, for me the one on the left is far better than the one on the above...
Pop up flash
Most cameras have a pop up flash, and I say most because the top of the range "Professional" cameras don't have, professionals wouldn't lower themselves using one...
The Pop up flash is like a miners lamp, pointing straight at, in the face of your subject, it gives what is known as headlights in the eyes expression, as you blind your subject with a powerful burst of light.
It is absolutely useless for macro also, because it is on the camera, and the length of the lens, and the closeness of our subject, means that the lens will block the flash from the subject...


And let's face it we all have a lens this long, that will focus this close, and yes in this scenario the light will not reach the subject !
The cold hard facts are quite different though, read on...
In the real world however, where men are men, and stay home at night and wash the dishes (well I put them in the dishwasher) The average length of a kit lens is 5 - 6 inches 12-14 centimetres, my Sigma 150mm Macro lens, with Extension tube (more about these later) is only 7 inches, 18 centimetres long. the closest focusing distance for the kit lens is typically 18" or 45cm. Put these two together and it gives you the image on the right, THE POP UP FLASH IS BRILLIANT FOR MACRO !!! it is a powerful burst of light, right on the subject, thus allowing faster shutter speed (freezing motion), smaller aperture (greater depth of field), lower iso (less digital noise) Get in, Kerching, Bonus...
However, you don't get something for nothing (Boo Hoo) using the flash will use up the camera battery quicker than not using it. Don't know any figures, but let's say without flash 500 shots, with flash 400 shots ! worth bearing in mind, take a spare battery


Depth of Field
This is the killer, trust me, this is Macro photographers biggest headache. The closer we get to our subject, the shallower the depth of field... That is fact, sorry nothing we can do about it...
Look at the image on the left, a Tenthredo Notha (Sawfly) on a cow parsley flower. It looks OK, click the picture it should zoom in, have a good look.
Top picture on left the insect is at an angle to the camera, bottom picture on the left the insect is parallel to the camera, making everything in focus

By moving the camera slightly and getting on an even plane with the subject we can improve the image by removing the different distance problem. It may only be millimetres, but it can have an impact
Focus Stacking
There is something called focus stacking, which is a bit of software called Combine ZP, google it, I found it here http://combine-z.software.informer.com/
Only for Windows though, sorry mac users, basically you focus on the nearest part of the subject, take a picture, focus out a little take a picture, focus out etc etc. Here I took 12 pictures, dropped them into Combine ZP, let it do the business. If you have photoshop you can do it in there or there are other dedicated focus stackers, Helicon focus for one, or Zerene stacker for two.
The program searches for all the nice crisp sharp bits, throws away all the nasty fuzzy blurry bits, then puts it all back together like a jigsaw to give us...


a stacked image that is in focus from front to back


Softly softly catchy monkey
Not saying you have to sneak around like a cat to photograph insects, but a little common sense and don't go wading in in your size 12's destroying everything in your path. Generally the slower you approach the less frightening you are, don't expect insects to sit there whilst you set up the tripod, clonk it on the floor right infront of them, twiddle with all the knobs and buttons, tweak the lens look through the view finder, and find nothing...
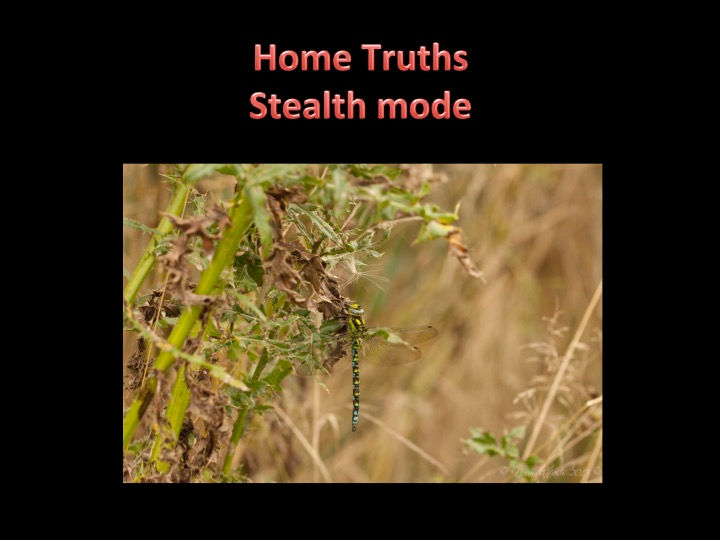
Below is a sequence of shots I took of a Southern Hawker, I was looking for Hawthorn Shield Bugs, and something whistled past my head, picked up the tripod and set off after it, probably 3 metres/yards behind it. When it landed on a thistle I stopped - put my tripod down - took a picture (or two) lowered the right hand front tripod leg - took a picture, lowered the left hand leg - took a picture, lowered the back leg - took a picture, moved arms length closer - took a picture, moved an arms length closer - took a picture, until I got to the position of shot 7, the closest. The first seven shots are from the left side of the dragon fly, causing one or the other wing tip to be out of focus, due to the depth of field problem. So I picked up my tripod one last time, moved away and round to the right to get parallel to the wings and get everything in frame - take a picture or two. If as I took the first picture it had flown off, I would have a picture, from a distance, but a picture. Confident that if I had waded straight in to the position of picture 7, it would of flown away without me getting a shot, & because I moved in slowly and quietly I posed no threat, and it was happy to sit there for me. Back away, tripod up, and softly away. One Southern Hawker, none the wiser...


And that is about the half time part of the show, brew time
Equipment - Tackle - Kit

Have to say I do like my gadgets, I have bought tried and binned quite a few, here's a run down on what's in my bag and what gets used...
Macro extension tubes
These are brilliant, they start at £5 and head on up to £80. And are just a piece of plastic tube, literally, hole straight through the middle, no cheap glass in there to degrade the quality of the photograph. And you get three different sizes, how good is that.
Let's look at the £5 ones first, for a fiver you get three different sized pieces of plastic, there are no contacts running through the middle, so you lose auto focus, you can't change the aperture, lose through the lens metering, everything is manual ! and being plastic mounts they can and will break, your lens will fall off and smash (not necessarily but you get the picture)
Next set up expense wise may give you one pair of metal mounts to attach to camera and lens. However if you want to change from one size to the other you have to unscrew six tiny screws & put
them in another one. A lot of meddling and fussing and hard work and not worth it, Next set up has all metal mounts, but still no electrical connectors through the middle. A lot stronger but we are still flying blind.
The "best ones" according to probably an article written by the manufacturers are Kenko. They sell for between £80 - £120. The set I use are Meike Automatic extension tubes and sell on ebay for around £50.
Whichever you decide on, make sure they have metal mounts, and are auto (contacts running through the middle so the lens can talk to the camera and visa versa.
Hang on, this is a plastic tube, no glass in it, how can this be any good ? Good question and I'm glad you asked, Read on...
So on the right is the sensor in my camera, it is an absolute, it cannot get bigger or smaller (without buying a new camera) Let's assume that the lens is a prime, 100mm again can't get bigger or smaller, and our subject, can get bigger, then will get a lot smaller but for the purpose of this, it is another constant. So if we draw lines from top of sensor to bottom of subject and bottom of sensor to top of subject we get a focal point in the lens when we are the right distance from the subject to give us an in focus image. "Click" picture taken. Now lets see what happens if we put an extension tube between the lens & Sensor


Sensor same size, subject same size, lens same size with focal point in same place, distance to subject same, extension tube moving the focal point away from the sensor. Now draw lines from top & bottom of sensor through focal point to our subject...
OH, we seem to have clipped approx 25% off top and 25% off bottom, doubled the image size, gone from 100mm to 200mm lens, gone from 10 feet away to 5 feet away...
How good is that, simple, effective, perfect, something for nothing - not quite, there's no free lunch, because the lens is further from the sensor you lose a bit of light, light falls off the further it travels, and you lose the ability to focus to infinity - Hey come on this is Macro right ? we don't want to photograph the moon, so not too great a loss, and the light fall off is very small, practically negligable
Tripod
If you have a compact/point & shoot camera, the good news is you can buy a tripod for £1, the bad news however for your £1 you get 3 plastic legs and a screw to put in your camera. Press a little to hard on the button and it'll fold.
You get what you pay for...
Over on the right is a gizmo called a Gorillapod from £15 - £80, the legs are flexible and bendy so you can wrap it round things, like a tree branch, or a tripod leg as in my photo. The clue is in the write up, flexible, bendy, press the shutter button the camera moves, really need a cable release.
In reality the more you pay the better you get...


or do you, the most expensive tripods are Carbon fibre, lightweight, give me a good old rock solid sturdy, weighs a ton, metal one anyday.
Humping a heavy tripod is a burden, however when I go out looking for insects, I flit from flower to flower looking, not much carrying in between. It's probably 1 mile from our house to Spud Wood, where I go looking (Mainly) and it can take me an hour to get there along the public footpaths that are lined with wild flowers and macro opportunities.
Bear in mind though (did you like that ? "Bear" in mind) even the heaviest sturdiest tripod can topple over... from the gentle touch of a giant Grizly Bear. And you called me a sissy for running away from a humungus spider, where's this sissy photographer ? eh ?...
One last thing about tripods, make sure the legs splay out so you can get down low, also make sure the centre column is removeable to allow you to get low.
Someone tried to sell me a tripod saying to get low down you turn the centre column upside down and shoot with the camera upside down. I called him an idiot (a little bit too loudly, everyone heard me) and walked out of the shop ! Salesmen don't care if they sell you rubbish, so long as they sell.
So what is wrong with this...


Ever tried standing on your head to take a photograph ? If the eyepiece is ground level you can't see through it.
Boy did I chuckle when that chain of shops went bust...
Close up lenses
Close up lenses look like a screw on filter, Before buying any of these find out what size thread is on the end of you lens, and buy the same size, otherwise they don't fit. They come in different strengths or "Diopters" to be correct.
They start at £10 for a set of four, this is mine, +1 diopter, +2, +4 & +10.
Four lenses for £10, that's £2.50 each, how good do we think a lens costing £2.50 will be ? you'll see later.
You can pay £40 for a known named set, I bought the cheap ones to try, if I like them I'll get the dearer ones... I didn't...


Bellows
These are like an extendable extension tube, camera goes on one end, lens on the other, when you turn the knob the lens moves further away or closer to the sensor. No electrical connectors through the middle so you are firing blind, no Auto focus, no TTL, etc.
In theory they are excellent, if you are in the house photographing something that won't move and you can afford the time to get the shot right. In the field however... Not got one, don't want one!
Slide Rail
I got one of these, in the house it's brilliant, set lens to manual focus, set shortest distance and twiddle knob to get focus. However it is no good out in the field, it now lives in a box in the attic,
Lights
There are more lights out there than you can shake a stick at (stupid saying) and I know I said the pop up flash was brilliant, everybody puts poor old pop up down, so I bigged him up a bit. Starting from left to right, the Macro O Flash, if you have an external speedlite, this fits on it and dangles over the front of the camera with the lens poking through it. Speedlite fires and the light is bounced around inside giving a ring of light. In theory yes, in practice no ! it weighs a ton, and even if your camera is on a tripod, come to move the camera on the ball head... sore wrist.
Macro Ring L.E.D Light
These are cheap and cheerful, start at approx £20 and go up to £30 odd. They do the job and I used one for a couple of years until I bought the one on the right - My best ever Macro purchase ( XXX - sigh )
Yongnuo YN14 EX TTL
This is the business, compared to

L.E.D ring flashes, it's like a candle and a search light. They run about £70 but are much much brighter than LED. With this baby screwed to the front of my lens I go from an aperture of 2.8 to F11, my shutter speed at 1/160 sec and an ISO of 100, press the shutter and it throws out enough light to illuminate the scene correctly with TTL metering

And if you've got megga bucks, Sigma EM140 £275 (last time I looked) with similar specs to the yongnuo.
Both Nikon and Canon make something like the middle one, good in theory, bad in pocket, 400 quid ? give me a break, and on the right is the Canon MR14EX TTL, that yongnuo copied.
I've had my Yongnuo for two years, and it has had some use, never a murmur, it just purrs through everything I throw at it!... I am not sponsored by Yongnuo or anyone else for that matter, I tell it as I see it ! But if anyone wants to sponsor me... feel free... Giottos, Canon, BMW, I'm not proud.
Waiting patiently for the call
Lenses
Of course it would not be complete without a look at a few lenses.
On the left is the ( old ) Canon EF100mm F2.8 non I.S. I have used this lens for years and loved it, it is crystal clear, sharp an excellent lens. In the middle is Nikons equivalent 105mm F2.8, can't speak from knowledge, but have never heard a bad word about it. Sigma also make a 105mm lens that is comparable to the above two, but without the manufacturer price tag.
Now I mentioned my 100mm was non IS. Image stabilisation is very good, don't get me wrong, worth the extra you pay to have it on a lens, However when I shoot macro I always (no exception, I cannot hand hold this close) shoot on a tripod, once you put the camera on a tripod you turn OFF the Image Stab. IS is designed to eradicate any movement in the photographer, up down left right, swaying... The camera is on a tripod

there is no swaying, so the lens is looking for something that isn't there. Turn it off, why pay extra for something I will never use, don't get it.
And finally the lens on the right is my go to lens now for Macro, my poor old EF100mm has retired. It is a Sigma 150mm F2.8. Again it is crystal clear and sharp as a tac & lives permanently on my Canon 7D, my macro set up... Canon 7D, Sigma 150mm F2.8 & Yongnuo YN14EX, Oh and don't forget my Meike 31mm extension tube

All the following images were taken on my old faithful Canon EOS 50D, and all taken with a borrowed 18-55mm kit lens unless otherwise stated.
Lens was set to it's maximum zoom of 55mm, and placed as close to the target as possible. With a kit lens this is typically 18" 45cm. Typical magnification factor of a kit lens is 0.16X, this is common through most lenses unless specialist lenses like Macro, which have a magnification factor of one (symbolised 1:1) beware some lenses say they are macro, but are 1:2 magnification factor, or half life size.
Here I used the Focus slide rail to get my focus, there you are told you I'd find a use for it...
Here we get hi tech, a 20p piece, a bit of sellotape rolled up and a cardboard box (no expense spared then)
So I've stuck a 20p piece to a cardboard box with a bit of sellotape, photographed it, copied it pasted it back in, cropped it and put it to the left of the original for comparison.
A 20p measures approx 22mm. no need to be exacting with this, you will see the results

Extension tubes


20p on left is same as above but with the 13mm extension tube we have gone from 22mm to 29mm approx 1/3 bigger,
Middle image is with 21mm extension tube and we have gone from 22mm to 31mm approx half as big again
Right hand image with the 31mm extension tube gives us 43mm approx twice as big as just the lens.
Again there is no glass in these, therefore no degredation in quality - Brilliant !
Close up lenses


Top left image with +1 diopter, from 22mm to 25mm
Above centre with +2 diopter, from 22mm to 28mm
Above right with +4 diopter, from 22mm to 34mm
Left with +10 diopter, from 22mm to 53mm, just over 1.5 times larger.
£2.50 lens, quality, actually isn't bad, the problem is as the name suggests, Close up, the greater the diopter the closer to the subject you have to be. with the +10 I was approx 3 inches away that's 75mm. if this had been an insect it would of flown, hopped, wriggled whatever, too close for comfort, and very hard trying to get any light in there, because you are so close you are creating your own shadow, blocking the light.
That is the way they work, you have to move closer to allow focus lock ! and that is why I didn't buy the more expensive ones...
Again maybe for playing in the house, but I do very little in here, I'd rather be out there looking.
100mm Macro Lens


And here we have the 100mm macro lens on the left, weighing in at 68mm, three times larger than the kit lens. If you plan on doing macro seriously or even semi seriously you gotta have one of these. It also doubles up as an excellent portrait lens, and with an incredible F2.8 will give you a sweet bokeh effect. Check out second hand ones, some shops do trade-ins so have 2nd hand ones.
And on the right, this was my set up for several years, the 100mm with 31mm extension tube. it's actually bigger than the ruler, let's call it 110mm (it was bigger than that) that is 5 times (five times) larger than the kit lens...But it doesn't end there - Oh No...
150mm Macro lens


This is the 150mm lens on the left, and the 150mm lens with 31mm extension tube on the right. The 150mm on its own is four times larger than the kit lens, and with 31mm ex tube... Any bodies guess.
Notice these last two are much brighter than the others, that's the power of the Yongnuo YN14 EX flash. All the rest were taken with, natural + interior + bedside + an old bike lamp + a speedlite.
If she'd let me I would sleep with the Sigma 150 on one side of my pillow and the Yongnuo on the other, that's how brill I think they are !!!